Google search engine is the world’s most used search engine and is known for its high quality, relevant results. Google custom search engine works on the core technology used in advanced Google Search, so the result will be similar to that in quality and relevance. Integrating this Custom Search engine to your website make the search clearer and easier for your website visitors to get the information they need. This Custom search engine comes with a lot of options including the customization of the look and feel of the search results, making money from the search using Adsense for Search, Linking the Analytics account to find the user behavior.
Creating a Google Custom Search Engine for your Website
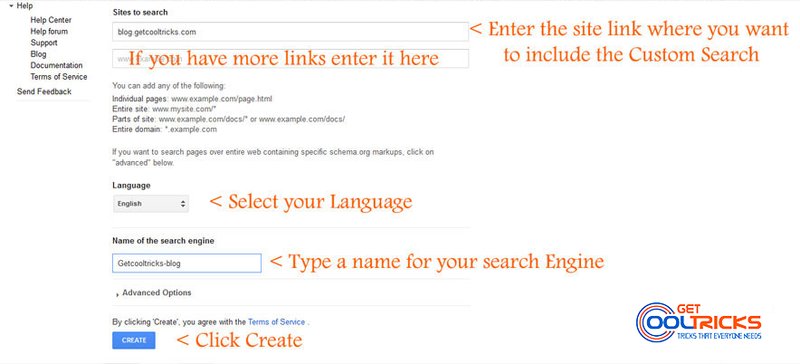
Sign-in to Google Custom Search Engine from this URL using your Google Account. If you are logging in for the first time you will be landing automatically on the New Search Engine page. Enter the site links where you want to use the custom search, select the language and enter the name for your search engine and click create.
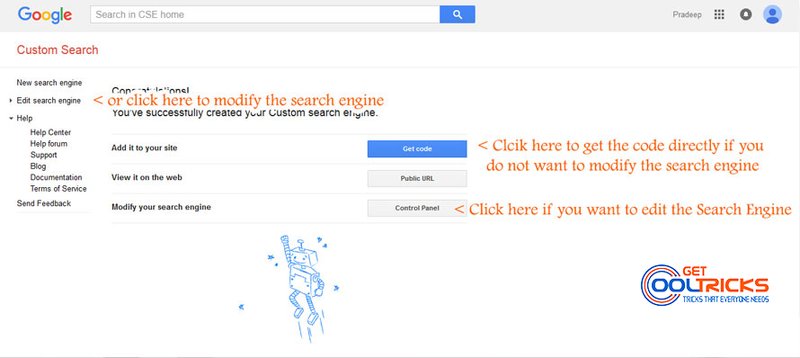
You will be taken to a page where you see three options. If you do not want to modify your search engine, you can directly get the code and use it on your website by clicking the Get Code button as shown. Click the control panel button or Edit search engine from the left sidebar to edit your search engine.
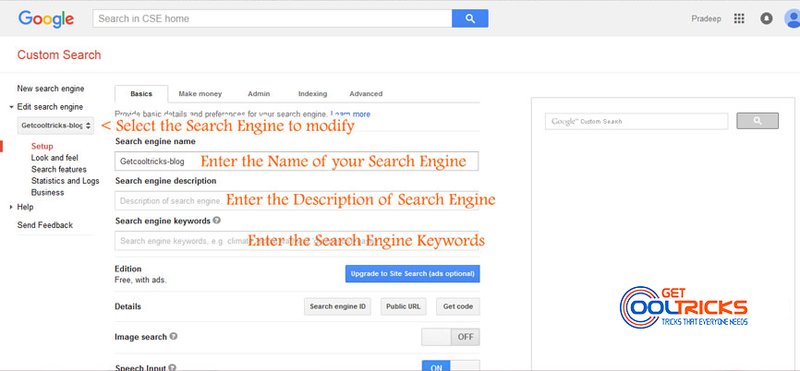
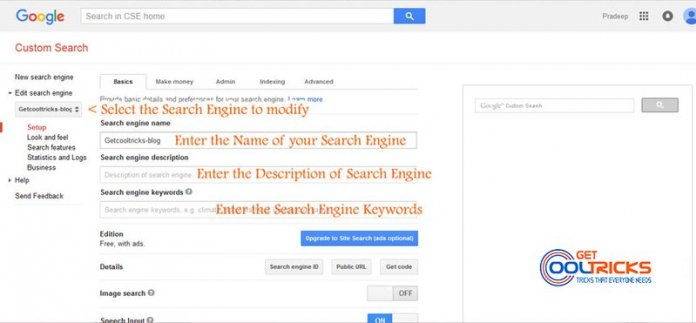
In the Search Engine setup menu, you will see five tabs. play around and choose the options that best suits your website and your needs. If you want to Monetize your search with ads you can link your Adsense account in the Make Money tab. Click the save button at the bottom to save your search engine settings.
Changing the Look and Feel of the Search Engine
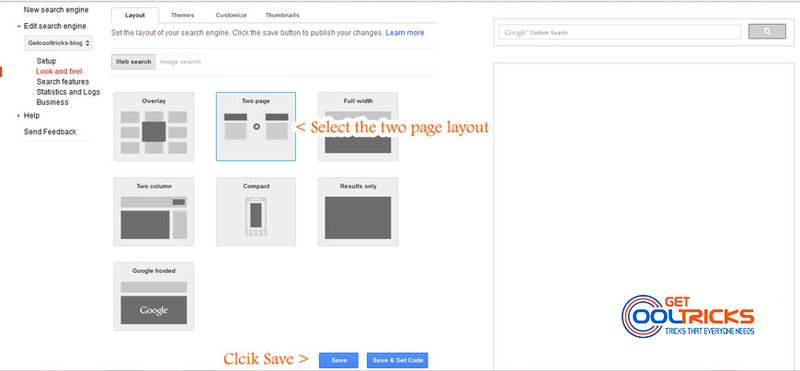
To change the look and feel of your search engine click the Look and Feel option from the left sidebar. This has the options and settings to change the layout, themes and customizing the search box, changing the colors of the links and the texts of the search results can be found here. Refer these images for details. The best layout for the website is ‘Two Page‘ layout. Select that and click save. We prefer Two Page layout. If you like other layouts you can choose anything and click save.
Choose a theme that matches your website from the themes tab as shown.
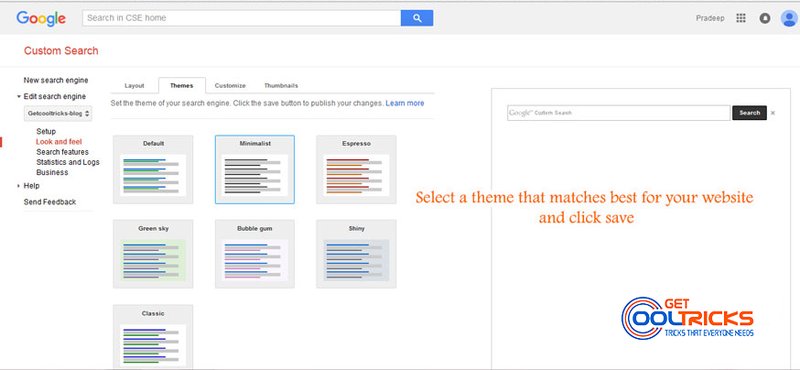
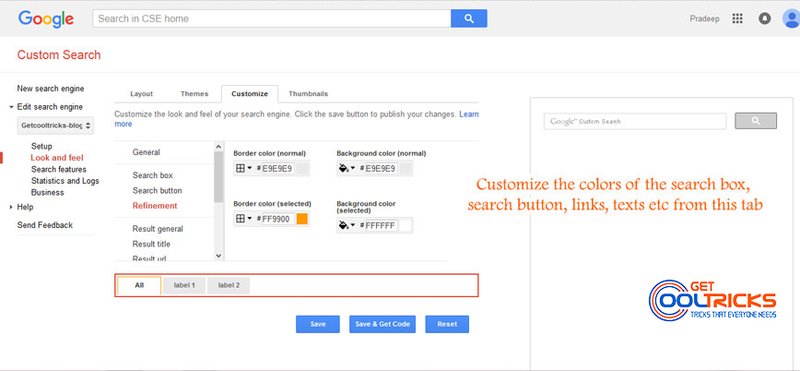
If you feel that the theme is not good, navigate to the customize tab. Colors of almost all the elements like the search box, search button, links, etc, can be changed here. Refer the image for details. Navigate to thumbnail tab and turn on thumbnails if you want thumbnails to appear on the results.
Advanced Features in Custom Search Engine
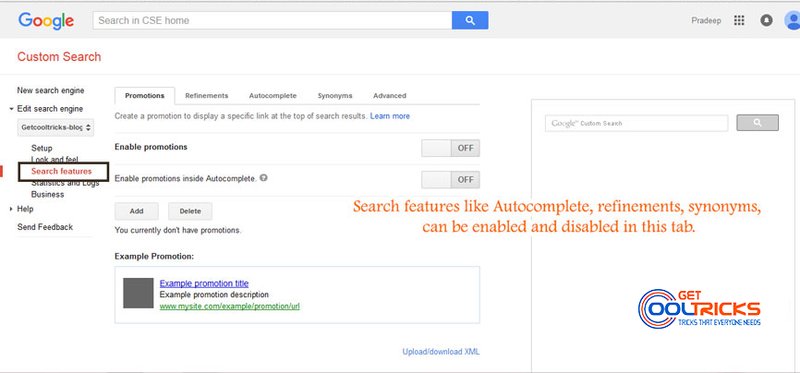
Advanced features like Autocomplete, Refinement, Synonyms can be enabled or disabled in the Search features options from the left sidebar. Refer to this image for details.
Almost all customizations are over now. You can get the code and integrate it into your website. You can get the code either from the Setup tab or from the Look and feel tab. Check the image for details.
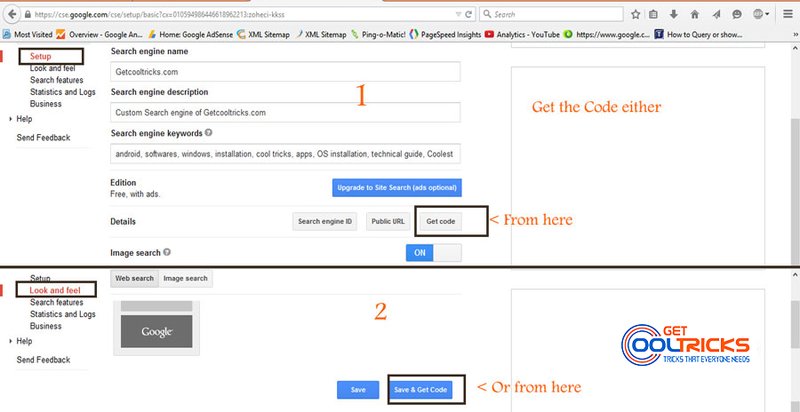
Since we have selected Two-page layout you will see two different codes. One is to render the search box and another one is to show the result. The first code you see when you click the Get code button is to render the Search box. Copy it and paste it into the place where you want to show the Search box. Click the Search Result Details at the top to enter the URL, where your results have to appear. Then click the Get code for search result button at the bottom to get the code for search results. Check the image for details.
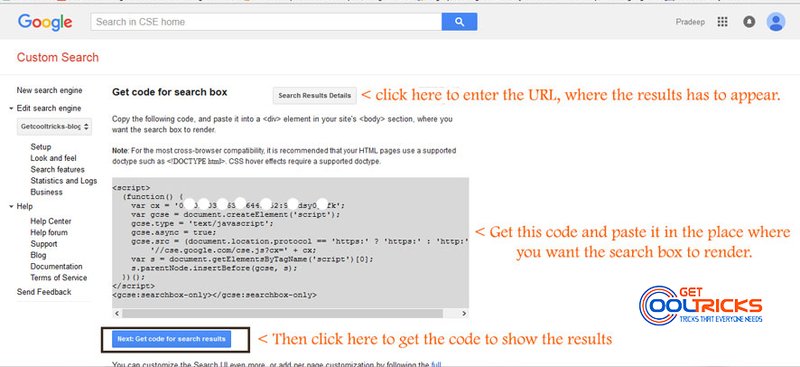
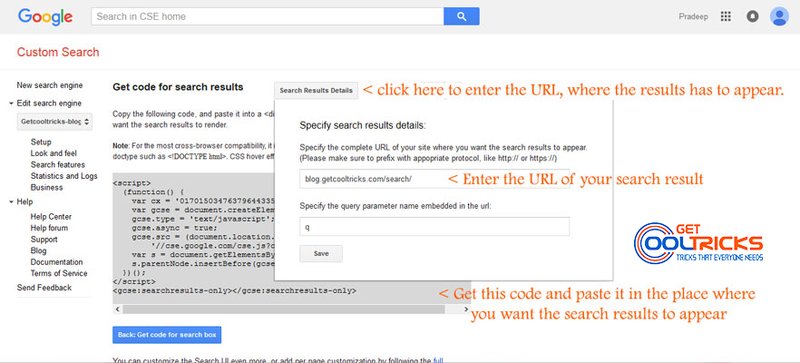
Now check the search box for its proper working. If you don’t feel that the look is good, you can modify the search engine at any time. Here is the sample code for the search engine. Replace the search engine ID with your search engine ID and the http://domain.com/search/ with your search result page URL.
Code to render the Search Box
<script>
  (function() {
    var cx = 'Your-search-engine-ID';
    var gcse = document.createElement('script');
    gcse.type = 'text/javascript';
    gcse.async = true;
    gcse.src = (document.location.protocol == 'https:' ? 'https:' : 'http:') +
        '//cse.google.com/cse.js?cx=' + cx;
    var s = document.getElementsByTagName('script')[0];
    s.parentNode.insertBefore(gcse, s);
  })();
</script>
<gcse:searchbox-only resultsUrl="http://domain.com/search/"></gcse:searchbox-only>
<script>
(function() {
var cx = 'Your-search-engine-ID';
var gcse = document.createElement('script');
gcse.type = 'text/javascript';
gcse.async = true;
gcse.src = (document.location.protocol == 'https:' ? 'https:' : 'http:') +
'//cse.google.com/cse.js?cx=' + cx;
var s = document.getElementsByTagName('script')[0];
s.parentNode.insertBefore(gcse, s);
})();
</script>
<gcse:search></gcse:search>
Note
You don’t need to change the code once it is integrated into your website even if you do some customization later. The changes will take effect automatically.
Other People are reading
- Good looking custom heading styles for your WordPress blog using CSS
- Using Google Drive to Host CSS and JS files
- How to download YouTube videos without using software
- Backing up a WordPress blog remotely on Google Drive


Hi,
After looking to many tutorials I found yours and It works great. Thanks!
By the way, I wonder if you may add a tutorial for css style the search form.
Regards