If you have an old Android phone sitting unused, you can give it a new purpose by turning it into a Jellyfin media server.
Jellyfin lets you keep your movies, TV shows, and music on the phone and stream them to other devices connected to your home network.
For this guide, we’re using an old Moto G71 5G with 6GB RAM and 128GB storage. You can follow the same steps with another Android phone with similar capabilities.
The setup doesn’t require root access, Ubuntu, or proot-distro. We’re using the native Jellyfin package available through Termux.
Install Jellyfin on Android
First, install Termux. Although you may find Termux listed on the Google Play Store, don’t install the Play Store version for this guide. Use a current version from an official/open-source source instead.
You can download Termux safely from open-source repositories like F-Droid or directly from the Termux GitHub Releases page.
If you plan to use Termux add-ons such as Termux:Boot later, install those from the same source as your Termux installation.
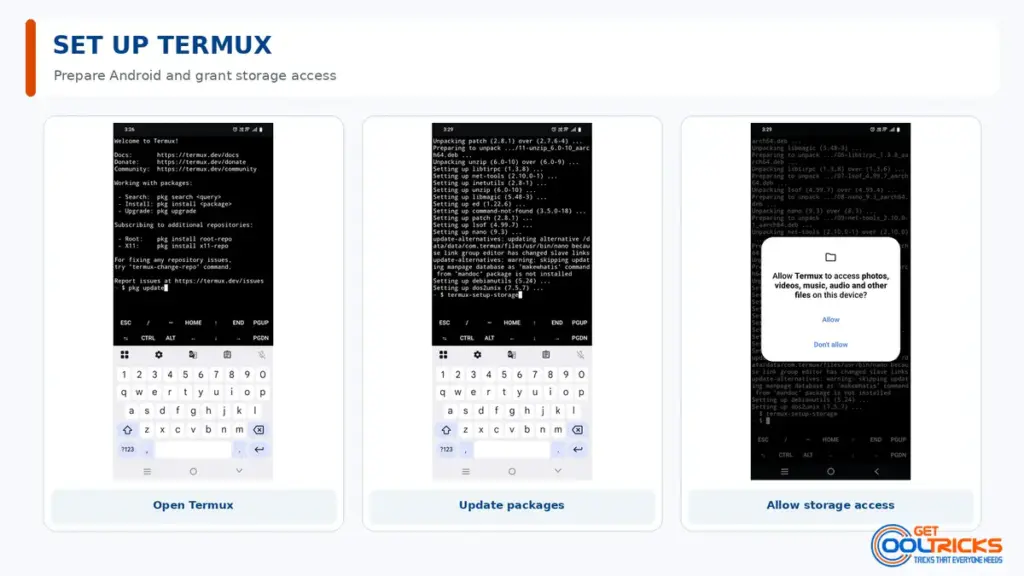
Open Termux and update it:
pkg update
pkg upgrade
Next, permit Termux to access your phone’s storage:
termux-setup-storageAndroid will ask for permission. Allow it.
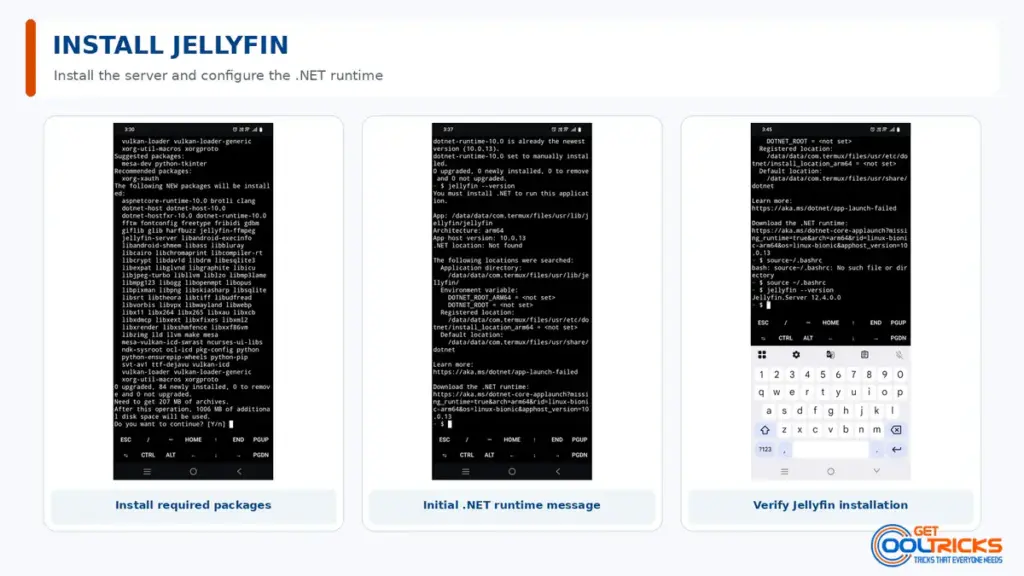
Now install the Jellyfin server:
pkg install jellyfin-serverWe also need FFmpeg for media processing:
pkg install ffmpegCheck and configure the .NET runtime
Check whether Jellyfin is installed correctly:
jellyfin --versionIf you see a message saying that .NET needs to be installed, install the .NET 10 runtime through Termux:
pkg install dotnet-runtime-10.0Next, configure the .NET runtime location. Termux installs .NET under lib/dotnet, but Jellyfin may not automatically detect this location.
Add the following environment variables to your Bash configuration:
echo 'export DOTNET_ROOT="$PREFIX/lib/dotnet"' >> ~/.bashrc
echo 'export DOTNET_ROOT_ARM64="$PREFIX/lib/dotnet"' >> ~/.bashrc
Apply the changes:
source ~/.bashrcNow check that the .NET runtime is available:
dotnet --list-runtimesFinally, check Jellyfin again:
jellyfin --versionIt should now display the installed Jellyfin version without the missing .NET runtime error.
Start Jellyfin
Once Jellyfin is working, start the server with:
jellyfin --ffmpeg "$(which ffmpeg)"Leave this Termux session running while you configure Jellyfin and test playback from another device.
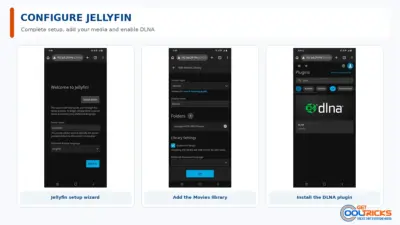
Open Jellyfin and add your movies
Jellyfin normally runs on port 8096.
First, find the phone’s IP address.
The easiest way is to open Android Settings → Wi-Fi, tap the network you’re connected to, and look for the phone’s IP address.
You don’t need to install anything in Termux just to find the IP address.
If you prefer to use Termux, you can run:
ip addr show wlan0If the command isn’t available on your installation, you can install the package Termux requests and run the command again.
Suppose your phone’s IP address is:
192.168.1.50On another device connected to the same Wi-Fi network, open:
http://192.168.1.50:8096Replace the IP address with your phone’s actual address.
Create your Jellyfin account
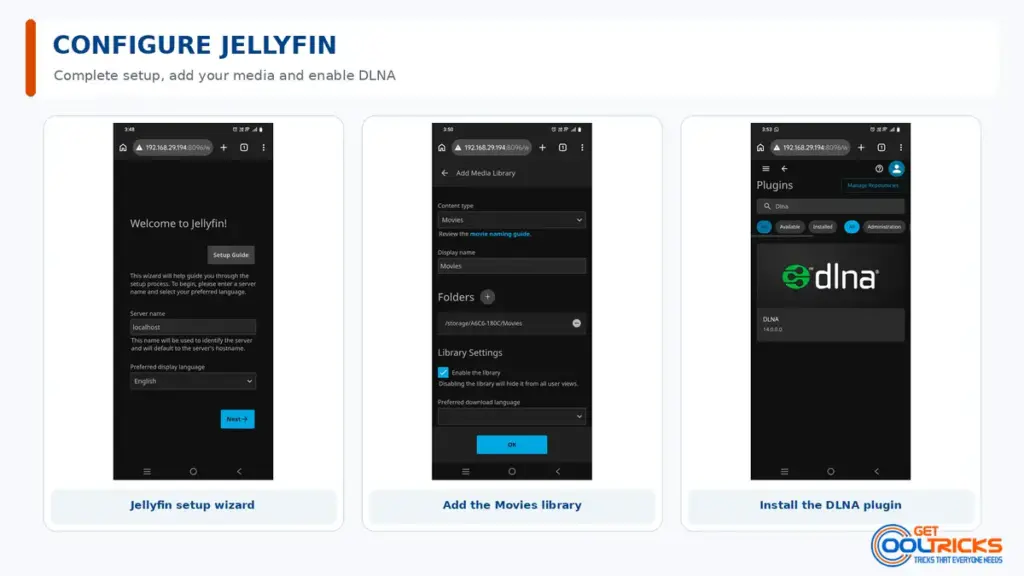
The first time you open Jellyfin, you’ll see the setup wizard.
Create an administrator username and password.
This is the account you’ll use to manage Jellyfin, add libraries, and change settings.
You can create additional users later if other members of your family will use the server. Each person can have their own login and profile.
Create a folder for your movies
Let’s create a simple Movies folder in the phone’s internal storage.
In Termux, run:
mkdir -p ~/storage/shared/MoviesThis corresponds to:
Internal storage/MoviesYou can copy your movie files into this folder using Android’s file manager, USB storage, or another method.
Create a Movies library
A library in Jellyfin simply tells Jellyfin where your media is stored and what type of media it contains.
In the Jellyfin dashboard, add a new library and choose Movies.
When Jellyfin asks for the folder, select:
/storage/emulated/0/MoviesA simple folder structure works well. Create a separate folder for each movie inside the Movies folder. For example, if you have Avatar (2009).mkv, put it inside an Avatar (2009) folder.
Keeping each movie in its own folder makes it easier for Jellyfin to identify your movies and download the correct posters and information. The same idea can be used later for TV shows and music.
Make Jellyfin easier on an older phone
An old phone can work quite well as a Jellyfin server, but you shouldn’t expect it to handle heavy video conversion.
The best situation is Direct Play. This means the phone simply sends the original video to your TV, phone, or computer without converting it.
In Jellyfin’s playback/transcoding settings, disable hardware decoding for this setup.
The reason is simple: we’re using an older phone as the server, and keeping the processing straightforward works better for this setup.
Whenever possible, use a playback device that supports the video and audio formats of your files. That allows Jellyfin to use Direct Play instead of asking the phone to convert the video.
After adding a movie, play it from another device and make sure everything works.
For example, you can install the Jellyfin app on an iPhone and connect it to:
http://192.168.1.50:8096Then sign in with the Jellyfin username and password you created earlier.
Add DLNA support
If you have a TV or media player that supports DLNA, you can make Jellyfin appear as a media server that the device can discover automatically.
Jellyfin provides DLNA as a plugin.
From the Jellyfin dashboard:
Dashboard → Plugins → Catalog → DLNA
Install the plugin and restart Jellyfin.
Once enabled, compatible TVs and media players on your home network should be able to discover the Jellyfin server through DLNA.
You don’t need to configure a separate media server for this.
Keep the phone plugged in
If you’re going to leave the phone running as a media server, it will probably stay connected to a charger most of the time.
If your phone has a battery charge limit or battery protection option, setting the maximum charge to around 80% is a good idea.
Not every Android phone has this feature, so don’t worry if you can’t find it.
If you plan to connect an external SSD or other USB storage, a USB-C hub with power pass-through can be useful if your phone supports USB-C OTG. You can connect the storage to the hub while charging the phone through the same hub.
Make Jellyfin start automatically
At this point, Jellyfin is working. You can now make the phone behave more like a dedicated media server.
By default, Jellyfin won’t necessarily start again when Android reboots.
For an always-on setup, you can use Termux:Boot, set Termux’s battery usage to Unrestricted, and use termux-wake-lock to help keep the server running.
We’ll cover automatic startup in a separate guide so we don’t complicate this installation.
Keep Jellyfin on your home network
This setup is intended for use on your local network.
Your phone and the devices you use to watch your movies should normally be connected to the same Wi-Fi network.
You don’t need to expose port 8096 to the internet just to use Jellyfin at home.
If you later want to access your media while you’re away from home, set up a proper secure remote-access solution rather than simply forwarding port 8096 to the internet.
That’s it
You now have a Jellyfin media server running on an old Android phone.
The phone stores your media, Jellyfin organizes it into libraries, and your other devices can stream it over your home network.
The setup is also easy to expand. You can later add Samba for network file sharing and SFTP for transferring files securely.
That turns the old phone into a small home server without needing to root it or install a separate Linux distribution.