
A Client ID in Google Developer Console is needed when you want to access the data stored in Google Account with the help of some other software clients. When Client ID is provided, the client can access the data that has been given access. For example, if you want to store some data into your Google Drive, you need to turn on the Google Drive API. Create and get a client ID. Enter the Client ID in client software, to which you are giving access to your Google drive. Now that client can access your Google Drive and can add and delete files in your Google Drive. Hope you are clear about the use of Client ID. Let us see the steps in creating a client ID. For convenience, I am creating a client ID in Google Drive API, as this may help me in writing other tutorials.
Creating a client ID in Google Developer Console
Login to the developer console using your google account from here: Access Developer Console
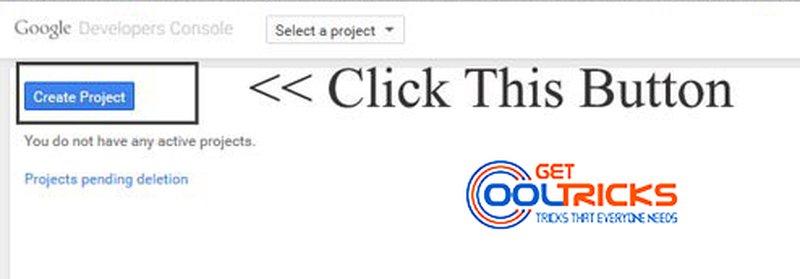
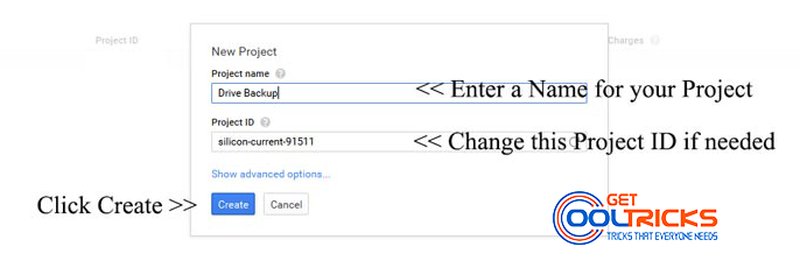
When you are logged in you can see a button named New Project click that and enter the details as required. Enter the name of your Project. You can leave the auto-generated project ID or else change it as needed. Now click Create button as shown here.
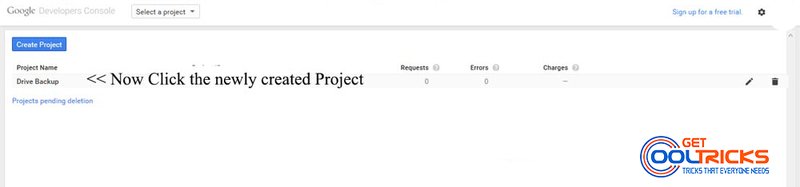
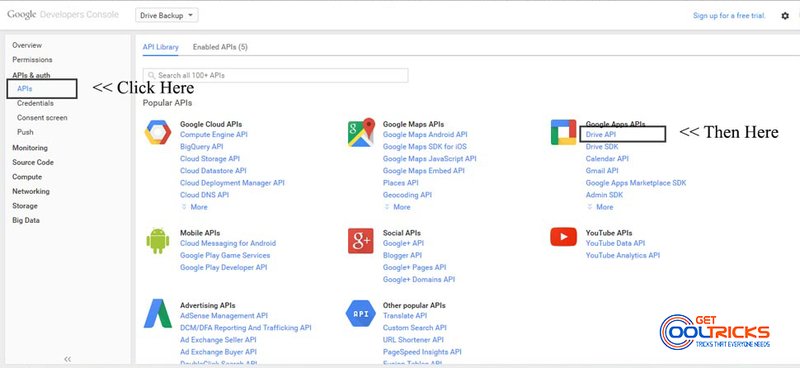
Now click the newly created project. You will be taken to a new page. From the right sidebar, click the APIs. In that check for the Google Drive API and enable it as shown here.

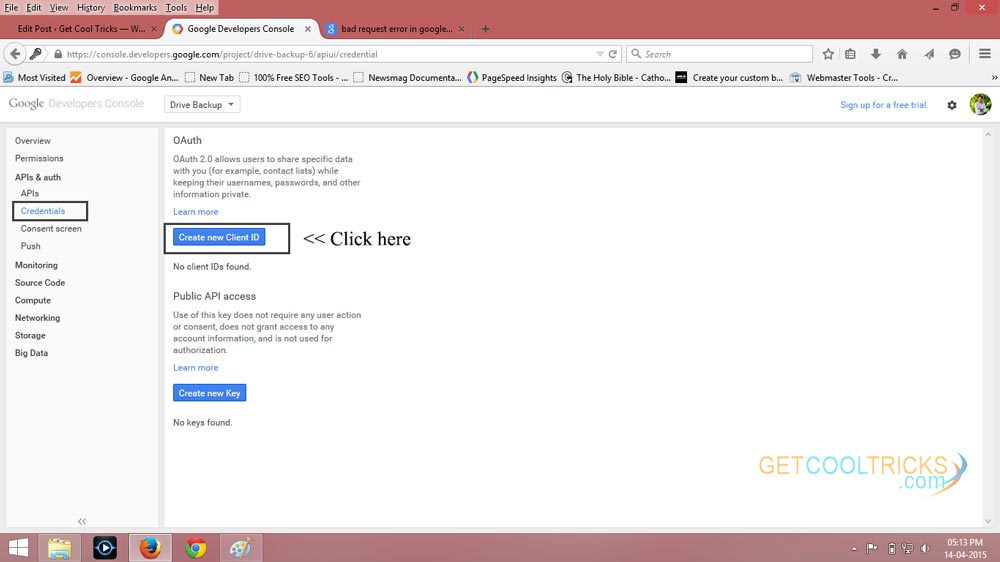
Your Google Drive API is now enabled. It is the time to create the Client ID. Check the left sidebar and click Credentials and in that click Create New Client ID as shown.
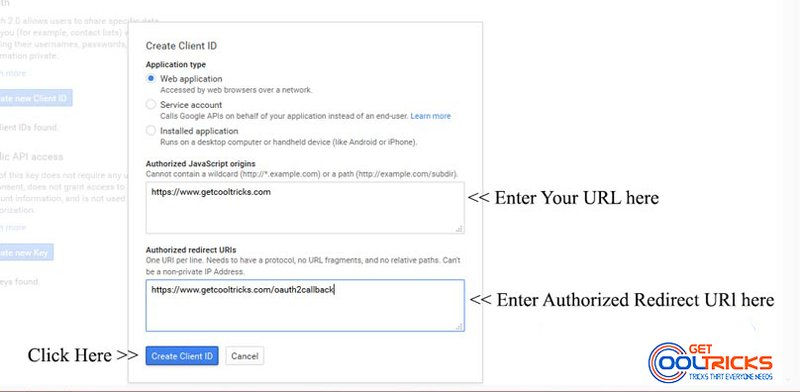
A popup appears. In that select Web Application. Type in the Authorized URL for JavaScript. This is usually your website address where you are gonna use the client ID. Type the Authorized Redirect URL. If you don’t know this, leave the auto-generated URL. You can change it later if needed. Check the following images for details.
You have now created your Client ID. Google won’t authorize your request unless you provide the proper redirect URL. So you have to enter the proper URL later on. If you want to change the details entered, you can click the Edit Settings button provided below the client ID.
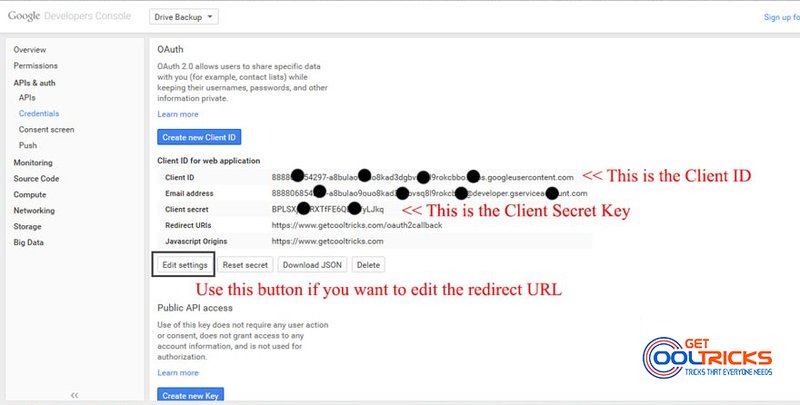
You have now successfully created the Client ID in Google Developer API. Do not provide your Client ID and Client Secret to others.
Want to read more, check our Tutorials on Android, Windows, Blogger.
Other People are reading
- How to Install Windows 7, 8 & 8.1 from USB Device
- How to Optimize Windows Startup
- How to Install Legacy Hardware in Windows OS